Installation Instructions
DEQ2496/DCX2496
- Power off and unplug the processor, then remove the top cover. There are 3 screws on the top and 3 screws on the back.
- Unplug the AC connection to the original power supply. You may need to work the glue loose before it will unplug easily.
- Cut the 7 wires leading from the original power supply to the logic board, cutting in the middle to allow room to reconnect them later.
- Unscrew the original power supply (4 black screws in the corners) and remove it from the enclosure.
- Position the new 12V power supply in the enclosure so that the bottom doesn't contact any metal and the wires reach the cut wires from the logic board.
- Using either screws or wire ties and anchors, affix the 12V power supply securely to the bottom of the processor enclosure, making sure the bottom of the board doesn't contact the metal surface of the enclosure.
- Individually connect and insulate all 7 power supply wires. The wires coming from the logic board are, in order:
- +15V (Red) Red
- -15V (Blk) Black
- +9V (Blk) Orange
- AGND (Blk) Green
- DGND (Blk) Brown
- +5V (Blk) Yellow
- +3.3V (Blk) Blue
- Install a 2A fuse in the fuse holder (if not already present)
- Drill enclosure and install grommet for +12V/Gnd/Remote wires
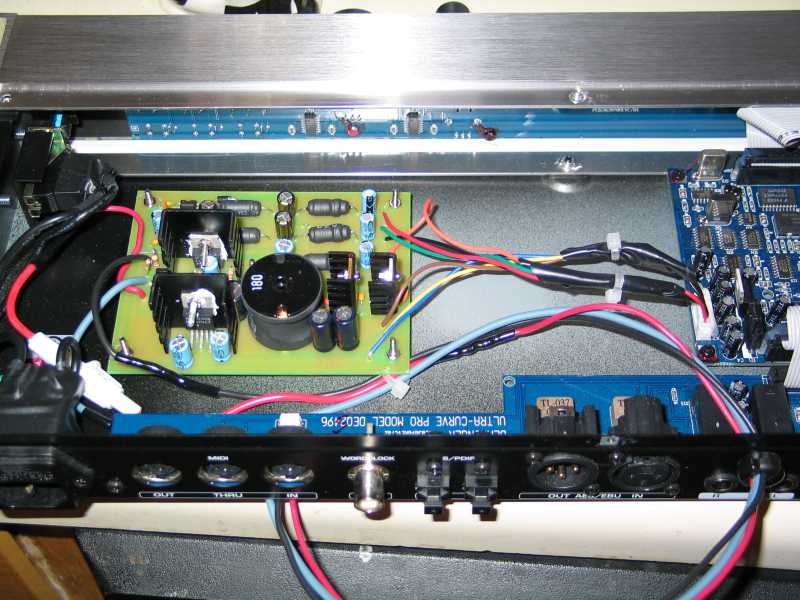
Finished product should look roughly like this (DEQ pictured):

DSP8024
Coming soon...
Copyright 2003-2004, Robert Minichino
